
Zoom ID Task
Courts can now configure pre-defined ZOOM ID information for each jurist! Here's how it works:
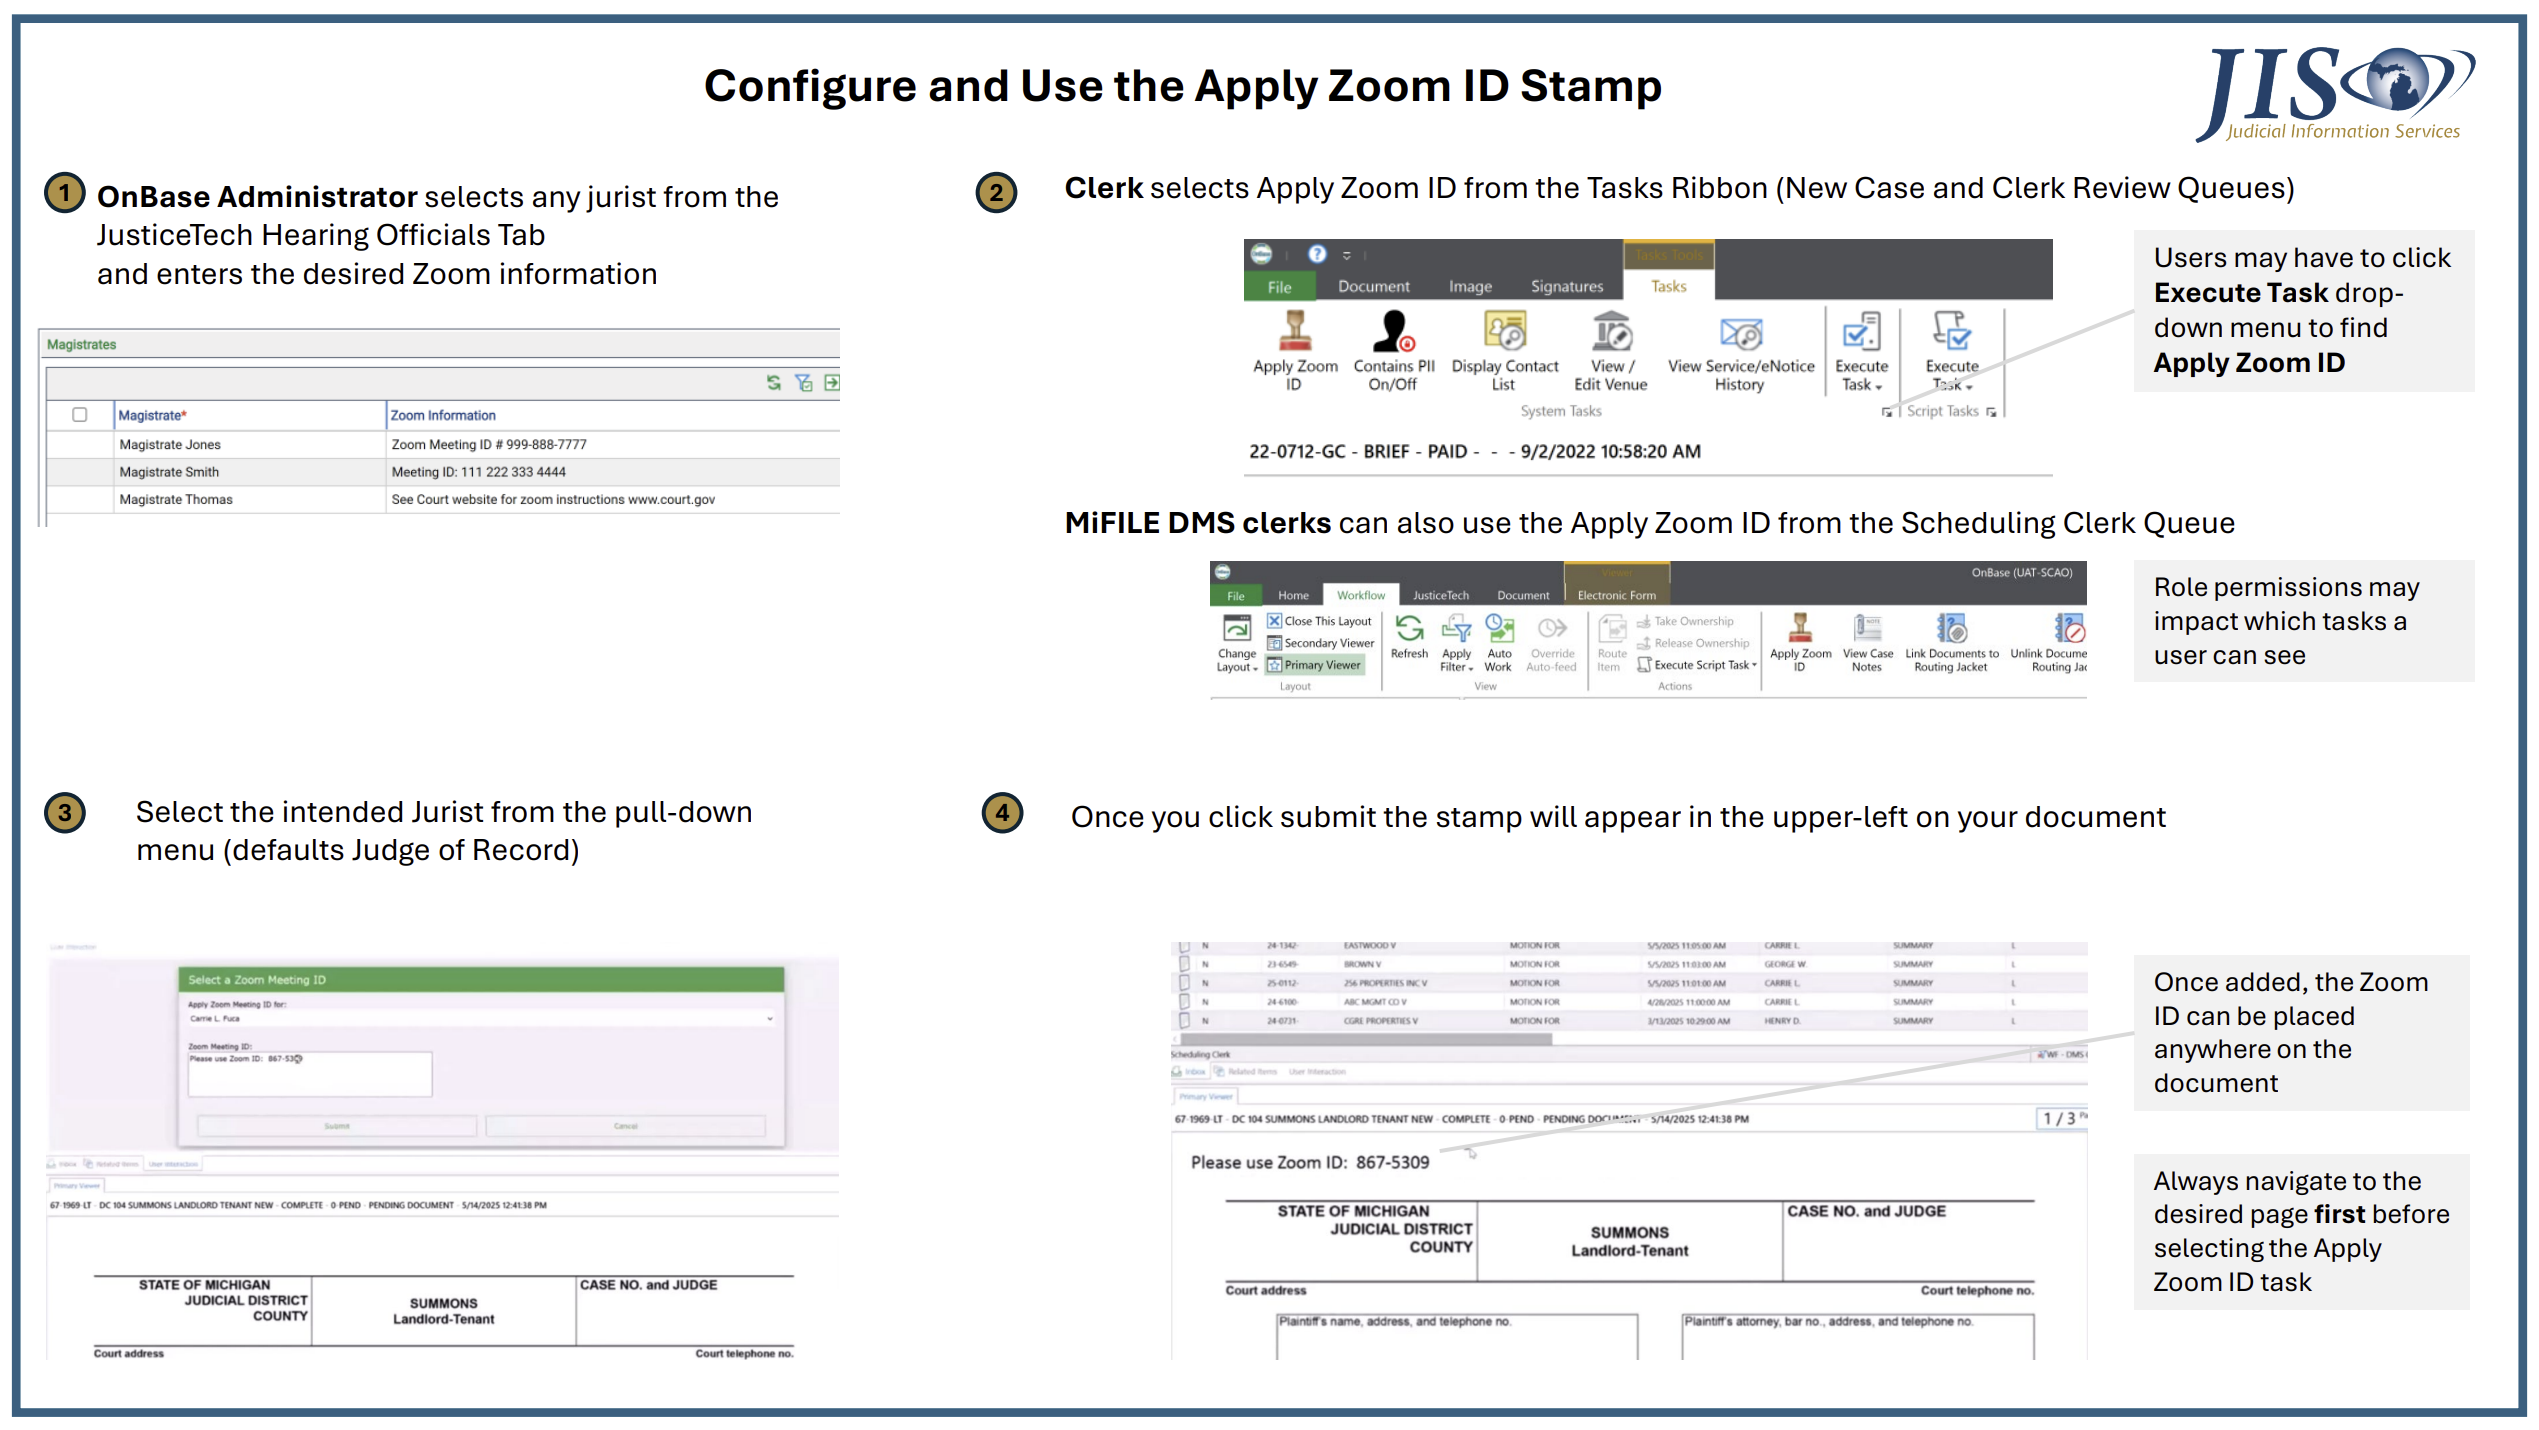
OnBase administrators can now add custom text in a "Zoom Information" field that is associated with each of the jurists found on the Hearing Officials Tab in JusticeTech (available for judges, magistrates, and referees). Simply double-click on a hearing official in the dataset, enter the desired value in the zoom information field, and click "Save and Close." Here's what one of those tables looks like in JusticeTech (note that this is supported for the judge, magistrate, and referee datasets).

Now that the OnBase administrator has set things up, the clerk can now apply the saved zoom ID to documents. Here's how that works:
There are two main ways to access the Zoom ID stamp.
1) From a document that is opened from a bundle within the New Case or Clerk Review queue.
2) From the Workflow Ribbon in the Scheduling Clerk queue (for MiFILE DMS courts only).
Starting with option one, which is available to any MiFILE court:
- Open the document from a bundle, and navigate to the page where you want to apply the Zoom ID.
- Go to the Tasks Tab, and select the "Apply Zoom ID" system task. Depending on your settings, you may need to click the "Execute Task" drop down to find it. If you've configured your system tasks to appear directly on the ribbon, it will look like the screenshot below.
- A window will appear with all available jurists in your court. OnBase will default to the judge of record for you, but you can change the jurist if necessary. You will see a preview of the pre-defined zoom information setup by your OnBase administrator for that jurist as well. Note that you are able to modify that text at this time, if desired.

- Once you click submit, you will see the Zoom information appear in the upper-left corner of the page. Click anywhere on the stamp, hold, and drag it to the desired location on the page.
For courts using the MiFILE DMS, you can also use the Zoom ID task in the scheduling clerk queue. With a document selected, simply click on the Apply Zoom ID task in the Workflow ribbon, and the experience is exactly the same as outlined above. Please note, however, that the Zoom ID task will only work for documents that have not yet been finalized (think pending or copied documents).
Please see the Configure and Use the Apply Zoom ID Stamp Job Aid below. You can download the original version here:
Idea Submitted by: 35th District Court (Plymouth)
Flag when Case Notes Exist
For MiFILE DMS courts, we are improving your experience with case notes.
- You can now tell if a case note exists--without having to click on the task to find out. From a hearing jacket, click on the cross-references icon in the top right corner. If there are case notes, you will see a case notes item at the top of the list.

- Double-clicking the case notes from the document information panel will open the case notes in a new, larger window that makes viewing and adding case notes much easier. Even better, you can now leave that case notes window open, move it off to the side, and continue to navigate workflow as desired without your ribbon and queues being greyed out.

Remember though that you still need to click either "Save Changes" or "Cancel" at the bottom of the case notes.
Idea Submitted By: 62A District Court (Wyoming)
Document Catalog Updates - District Courts
The "Summons Reissued 91 Days" document catalog entry (doc code SUMR) is being updated to read "Order for Second Summons Reissued - 91 days" to better communicate that this entry is classified as an order document type.
Idea Submitted by: MiFILE Implementation Team on behalf of onboarding courts
The existing "Notice of Judgment Lien" document catalog entry (doc code JOFJL) is now available in small claims cases.
Idea Submitted by: 79th District Court (Oceana)